Monday, November 10, 2008

Using Photo Clusters in FotoFusion

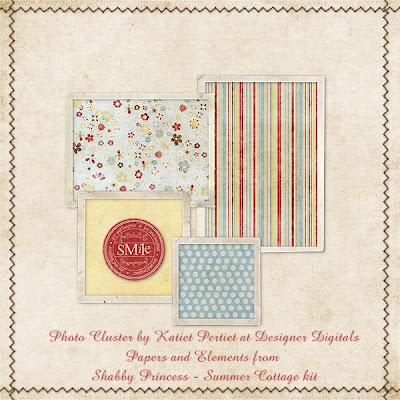
Designer Digitals is having a twenty-five cent sale on Katie Pertiet's Photo Cluster No. 07. I will be using the first one to demonstrate how to use Photo Clusters in FotoFusion.

Editing to say that if you missed the sale at designer digitals Molly and Max has a freebie photo cluster that you can use to play around with this concept. Just an FYI...Designer Digitals has twenty-five cents off sales each week. You can sign up for their newsletter if you want to be reminded.

1. First set your page up in FotoFusion. I am creating a 12x12 collage. I like to add a .125 Safe Inset so that nothing important gets cut off in printing.


2. Bring the photo cluster into FotoFusion. There are various ways to bring items into FotoFusion. I just open the folder that has the cluster and drag it onto the canvas.


3. Next we want to protect the cluster so that it doesn't move around when you start adding in your photos. Click on "Tools" in the top menu bar, select "Layers" then check the "Protect" box.


4. The next step is to create the frames that we are going to add our photos to. Holding the "F" key and using one of the frames in the cluster, draw out a frame in the size you want. Turn off the border and the shadow on the frame. Repeat this step for all the frames in the cluster.

5. Next add your photos to each of the frames that you created. For this example I am using papers in the frames because I am not at a computer that has my photos. You should be able to just drop your photo directly into the frame.


6. Some of your photos may not be layered properly. Review each individual frame in the cluster and note what is not layered properly.


7. Right click on any layer that you want to move and select the appropriate command. (Send to back, send to front, bring forward, send backward). Sometimes this is just trial and error.


8. Add any other papers or embellishments and voilà your layout is complete.
Friday, October 10, 2008

Just Another Day in Paradise...

That's at least what October 1st was to me. But it was also the day that Stacy Julian challenged us to give ourselves a present. Woo-hoo count me in. I just LOVE presents. Well, it was a little different present than I expected. You can read all about it at her BLOG.

I don't have my pics in a little album yet. One is coming thanks to Amy Sorenson. I was one of the first twenty-five posters on her blog and she will be sending me a cute little album to put my cute little pictures in!

Here are the pictures. All taken on October 1, 2008. Sure if I was to choose ten photos to represent my life I would have chosen much different pictures. But I read Stacy's challenge, I had my camera in my purse and this was my day. Just another day in paradise!


For a brief description of each photo and why it was important to me on 10/1/08 see the set at my flickr

Thursday, October 02, 2008

Life, organizing and the pursuit of designing...

Where have I been? What have I been doing?

Resizing 200 layouts to be printed so I could take advantage of the special offer from MyPicTales...yes it was a bit of work to resize my layouts to have the bleed required by the site. But I got 200 layouts printed for free...nada....zich...zilch! But if you missed the special don't despair. 8x8 layouts are fifty cents ($.50) and 12x12 layouts are seventy-five cents ($.75) So at that price you have no excuse not to get your layouts printed and into albums so your family and friends can actually see them.

Speaking of albums, after reading Stacy Julian's book Photo Freedom, I have been in the throes of reorganizing all my albums, in addition to printing hundreds of digital photos, and basically rethinking my whole scrapbooking/photo storage process. Oh yeah, I jumped right into the whole shebang...I got the Pioneer Storage Binders, the category drawers, the 12x12 albums, some 8x8 albums, the circle tags, papers to match the 12x12 albums, matching ribbons, etc. When I decide to do something I take off...I only hope that I continue and do not run out of motivation.

Oh my gosh I have spent days, hours, up until the wee hours of the morning working on some of the initial organization. It will probably take six months to get everything fully implemented and sunk into my brain. But what I have so far is now a system that I can work at in small increments. (you know the good ole 15 minute routine) And it is set up enough that I will be able to start my next project...

I am enrolled in Cathy Zielske's Design Your Life class over at Big Picture Scrapbooking. In fact the class starts today. Now you know I am a digital scrapbooker. But I have decided to TRY and do my layouts in paper. You may think this is like taking a step backwards. Maybe it is. But I am such a paper klutz I really want to force myself to work in this area. You say "oh no you are not a klutz". Well let me tell you it took me like an hour just to tie a little ribbon on the clasp of my album. Seriously....how can tying a little ribbon be so darned hard??? First you cut the ribbon too big...then you cut the ribbon too small...then when you tie the ribbon the pretty part is inside out...was I not standing in line when God passed out craft skills???

Oh and then there is the inking the edges thing. On the computer, I can grab a brush ink my edges and it is done. In real life????? Just rub the edge of your paper on the ink pad. You rub it the first time and no ink appears on the edge. Rub it a few more times...oh look the edge you don't see has ink. I want to be able to see the ink when the paper is adhered to the background. Ok so angle the paper...oh look I have a nice neat line of ink. I don't want a nice neat line. It is supposed to look grungy. Keep angling and be a little jerky. Now I have ink on my fingers, on the middle of the paper not just on the edges. Ok so throw that away and try again.

Well, I at least got my Pre Work assignment done. It is in paper and there are some inked edges. It took me forever. And Stacy Julian says to just create a title or section page in one of your 15 minute sessions. I don't think so!


Note the journaling in the bottom square. It looks a little too neat doesn't it? That is because Darcy Baldwin created a font from my handwriting. I think it is really cool even if it is much neater than my regular printing. I have pretty much been using it for the journaling on my digital layouts to give a bit of personal touch. So I typed it up and printed it out for the paper layout.


Thursday, August 28, 2008

I am Adhesive Challenged...

I am going to the Sacramento Scrapbook Expo in October with Liz, a friend I met at the DSP Adobe Laptop Crop in July. I am signed up for a few classes and in looking at the supplies list what I notice most is adhesive, adhesive, adhesive!

I like the adhesive tape runners but for some reason they don't like me. I have tape in the darned thing but it doesn't come out...too much tape comes out but it is not on my papers it is just hanging out all over the table...the tape comes off but the left over piece doesn't feed back in and it is hanging all over the table..."easy to replace refills"...easy for who...engineers? I finally get on a roll and run out of tape and have no more refills. I tried the darned purple glue that dries clear...well explain to me why I have dried purple goop on my layout? I am apparently adhesive challenged.

I was thinking about what to bring to the Expo in October. I did a little research and I have come upon the decision to try something new. Ta-Da...it is the ATG tape gun...I know it looks big but the posts I have read indicate that it is light and easy to use. And it holds something like 36 yards of tape. Also for little ole challenged me, there is a loading instruction and video at Framing Supplies dot Com, the site I purchased it from. And just for a little insurance, I bought the refill tape also. Yes there is an upfront cost. But apparently if you do the math you will start recouping the costs in a short time. Of course that would depend on how often you scrap. Although I am an accountant by trade, I didn't bother doing any math here. I just looked at the shiny red gun and said....ooohhhh I like....and clicked on the add to cart button and the rest is history. I can't wait until it arrives. I will check it out and report back if adhesive challenged me could use it with ease.


You can Google this as it is sold at various sites. I bought mine from Framing Supplies dot com. $41.69 for the gun and $3.30 for the refill. I read in some posts that you can get the refills for $2.00. I don't know if that is an old price or if they are available somewhere for that price. I just decided to buy the refill with the gun since I was already paying for the shipping.

Wednesday, August 27, 2008

Pics to Scrap

Just thinking about all the layouts I need to do. I really need to develop a list of what I want to accomplish. When I actually sit down to scrap sometimes my mind goes blank and I can't think of what to do. Yet...I have so many photos that need to be scrapped. I want to go back and finish the Reality Scraps from 2007 at Scrapbook Graphics...I need to update my annual Casini Ranch album for our trip last November...I went on three vacations this year...

Hopefully the new organizational system I wrote about earlier will help me get some scrapping done!

Credits:
Shabby Princess Summer Cottage kit
SBB Tidbytes with compliments 2008 kit
Staples from Lumapix and SEI

Photo Freedom aka Getting Photos Organized

I have been reading Stacy Julian's books on her photo and layout organization. Stacy has given me a new way of looking at how to organize everything. What I like about her style is that she presents what she does and explains how and why she does it. Having this information enables you to adapt the system to meet your own needs.

Stacy is a paper scrapper so her system starts with a printed photo. Since I am a paper and a digital scrapper, I am going to adapt her system to bridge my paper/digital organization. At the present time my paper system is one mish-mash-mess and my digital system is actually fairly organized. My plan is to organize my printed photos and layouts "loosely" based on Stacy's method. I say "loosley" because Stacy is right brained and I am left brained. So, our systems will naturally be slightly different.

For my digital photos and layouts I only need to make a few modifications and my digital photos and layouts will be organized exactly how my paper ones are organized. What a concept! I will have an All About Us 3-ring album and I will have an All About Us digital album. The albums will not necessarily have the same layouts in them because I don't print all my digital layouts and I don't scan my paper layouts. But the systems will be similar so finding things should be a lot easier. I am so super-de-duper excited about this. Organization makes me HAPPY!


The Big Picture was Stacy's first book. It talks more about her layouts and how you can set up a system to NOT scrap chronologically so you never feel like you are behind.

Photo Freedom is Stacy's latest book. It goes in depth about her actual system for photos and layouts. She explains what tools she uses and exactly how she uses them. She provides the details of the tools that she uses but encourages you to start with what you have on hand and not to go out and necessarily purchase everything that she uses. That way you can understand the nuts and bolts of the system before you add in the bells and whistles.

She explains the process that a photo takes. From printing it off the computer, where it gets filed, how it will get scrapped etc. It is very obvious that Stacy practices what she preaches and her ideas have certainly opened the floodgates of ideas and possibilities for my own process.

Friday, July 18, 2008

Here are the brag book pages I made for the July Brag Book Exchange over at Digital Scrapbook Artisan Guild.


The idea of the challenge is to put together a set of 4x6 ready made pages to complete a 4x6 freestyle brag book album. We use the Monthly Guild kit to build our layouts. Post the finished layouts and then send a .png file to the monthly leader. She packages them all up and sends everyone who participates the completed album.

It is so much fun and I love all the creative brag book pages that everyone submits.
Next week, on July 26th, I am very excited to be going to....

DSP at a Laptop Crop at Adobe Headquarters in San Jose, CA!


I've never been to a laptop crop. I have inherited Lacey's Dell laptop and have spent all week getting it configured and set up so I can take it to a crop. I've installed...
  1. Photoshop
  2. Adobe preset folder (brushes, actions, etc.)
  3. Plugin folder (I haven't used these in a while but ya never know!)
  4. All my fonts!!!!!
  5. Main Type (my font managment program)
  6. IMatch (the program I use to manage my digi scrap supplies)
  7. I made sure my EHD could plug into the laptop and there will be outlets at the crop
  8. I also made sure that IMatch on the laptop could read my EHD. This entailed telling Microsoft that the EHD is actually a different drive than Microsoft thinks it is
  9. The drivers for my Wacom Tablet (I hope I have time to finish my tablet class before next Friday!)
I think I am set to go. Oops...you know what I have forgotten?? My pictures! Silly me, what would a crop be without PICTURES!!!!! Need to take care of that tonight!!!!!!!!!!!!!!!!

I'm hoping to get some scrapping done. Although some have said that they are so busy running around, having fun, meeting fellow scrappers and eating chocolate...that they don't get much scrapping done!!!!!

One of the fun activities is to swap ATCs (Artist Trading Cards). These are cards you create that say something about yourself. This is the ATC card I made to take to the crop.

Sunday, May 11, 2008

Thursday, May 08, 2008

Lentil Soup


We love Progresso's Lentil soup but one day we were all out of it. I knew I had lentils in the cupboard so I pulled out The Sonoma Diet book and found a recipe for Ham and Lentil Soup. Surprisingly enough I had all the ingredients I needed to make the soup. I am not a fan of chicken bouillon granules so I substituted Trader Joe's low sodium fat free chicken broth. It was different than Progresso's of course but we really liked it.

HAM AND LENTIL SOUP

Ingredients
  • 1 cup dry brown or French lentils
  • 1 medium onion chopped
  • 1 cup chopped celery
  • 1 cup diced carrots
  • 1 tablespoon extra-virgin olive oil
  • 5 cups low sodium fat free chicken broth
  • 2 cloves garlic, minced (1 teaspoon minced)
  • 1/2 teaspoon finely shredded lemon peel
  • 1/4 teaspoon cayenne pepper
  • 1 cup cubed cooked ham (about 5 ounces)
  • 2 cups chopped fresh spinach
Instructions
  1. Rinse and drain lentils; set aside.
  2. In a large saucepan cook onion, celery, and carrots in hot oil about 10 minutes or until tender. Add lentils, the chicken broth, garlic, lemon peel, and pepper. Bring to boiling; reduce heat. Cover and simmer for 45 minutes. Add ham; simmer, uncovered, for 15 minutes more. Stir in spinach. If too thick add a bit more chicken broth. Serve immediately.

Wednesday, May 07, 2008

Weight Watchers Italian-Inspired Zero POINTS-Value Soup

Even though it is spring we were still having some cold spells and I got in the mood for soup. I decide to make Weight Watchers Italian-Inspired Zero POINTS-Value Soup. It turns out so yummy. We eat it for days. We eat it as is one time, add left over meat to it another time. We eat it for dinner one night and lunch another day. It is such a versatile soup. Below is the "official" recipe. I think I used just one can of vegetable broth and filled the rest with Trader Joe's Low Sodium Fat Free Chicken broth. I also added some beans to it, which totally ruined the whole zero point concept, but it sure did taste good. Beans are not in the photo because it was a last minute idea.

Ingredients

  • 2 cup escarole, chopped
  • 2 medium garlic clove(s), minced
  • 1 cup onion(s), chopped
  • 2 cup spinach, baby leaves
  • 2 small zucchini, cubed
  • 1 medium sweet red pepper(s), chopped
  • 1 medium fennel bulb(s), thinly sliced
  • 6 cup vegetable broth
  • 28 oz canned diced tomatoes, preferably fire-roasted
  • 1/4 tsp crushed red pepper flakes
  • 2 tsp thyme, fresh, finely chopped
  • 1 tsp fresh oregano, finely chopped
  • 3/4 tsp table salt
  • 1/4 tsp black pepper
  • 1/4 cup parsley, fresh, chopped
  • 1/4 cup basil, fresh, leaves

Instructions

  • Put escarole, garlic, onions, spinach, zucchini, red pepper, fennel, vegetable broth, diced tomatoes, red pepper flakes, thyme and oregano into a large soup pot. Cover and bring to a boil over high heat. Reduce heat to low, and simmer, partly covered, for about 10 minutes.

  • Stir in salt, black pepper, parsley and basil. Serve. Yields about 1 cup per serving.

Saturday, April 26, 2008

Art of Kathleen Francour...

Digital Scrapbook Place is having a challenge in April to do layouts based on the art of Kathleen Francour. Her gallery is here: www.kfrancour.com/newsite/gallery.html


Credits:
Fantaisie D'Aile freebie by Kim Liddiard
Bud Beauties papers freebie by Kim Liddiard
Sparkle Butterfly freebie by Lauren
Flower photo from stock.xchng
Lace border mask by Obsidian Dawn


Credits:
Bow from Meryl Bartho's Feminine Denim kit
Lavendar paper by alla
Floral paper by patchheart
Overlay from Seasons of the Heart kit
Scalloped template mat by digiscrap.ch
Yellow flower by Heidi Kuester
Purple flower by Kim Hill
Pink jewel flower by Nowan

Friday, April 25, 2008

Give your worries to God...


One of our bible studies was on trusting God and not worrying. Shortly after that this Ziggy cartoon was in the paper. I took the liberty to modify it a little and create this layout.

Thursday, April 24, 2008

Mandy...

Isn't Mandy just the cutest thing. If you have a little dog you would like to showcase, just click on the photo to download the frame in png file.

**Sorry Link will expire 6/30/09**

Wednesday, April 23, 2008

High Key Photos in FotoFusion

Trying to create a high key photo in FotoFusion. Click on the thumbnail to see full size.


DSAG April Notebook...

I am having so much fun with this month's notebook. There is an article about free style layouts and another one about black and white layouts with a hint of color. Here are two layouts that I have made based on the articles and using this months Guild kit.

The first layout was also part of a challenge to use the word begin. The word begin reminded me of this sunrise picture I was fortunate to take. I say fortunate because I am not a morning person so I don't generally get the thrill of seeing such a spectacular site.

For my black and white layout, I used this photo of my husband with our son's new dog Mandy. We have really been enjoying Mandy and we get to babysit her when my son works 48 hour shifts. I used FotoFusion to create this layout. I converted the photo to B&W in FotoFusion and adjusted the brightness, gamma and contrast to attempt a more high key appearance. I used the April guild kit for papers and elements. The damaged canvas and the black border come with FotoFusion.

Tuesday, April 22, 2008

Project 366...

My photo a day is turning into more like a photo once in a while. I haven't uploaded any photos since March 24th. How do the days go so fast????? Here is what I have so far. Click on the mosaic to go to Flickr to see the pics in detail. I'll post more pictures this weekend.

Brag Books....

We are putting together a set of 4x6 ready made pages to complete a 4x6 freestyle brag book album at Digital Scrapbook Artisian Guild (DSAG). The idea is that we use the April Guild kit to build our freestyle layouts. Everyone who participates will receive the complete album. Here are three pages that I contributed to the album:


Wednesday, April 16, 2008

Brackets...

Brackets are everywhere these days. Here are a couple of goodies I made playing around in FotoFusion. A bracket frame and a bracket mat. These can be used as mattes in FotoFusion or as templates in Paint Shop Pro or Photoshop. To download these just click on the image, then right click and choose "save as".

Happy Scrapping!

Saturday, March 08, 2008

What to do with a can of Coconut Milk...


A can of coconut milk was one of the gifts I got from the Martha Stewart show last November. It has been sitting in my pantry just waiting for me to find the perfect recipe. I found a great recipe for Thai Chicken Skewers from the Weight Watchers website. The chicken skewers were so good they did not taste like a "diet" recipe at all!

Click on the recipe to download a full size version that you can print out for your files.
Credits: Weed & Wildflowers Paisly Ivy, Welcoming Spring and SA Reverie Kits
Rusty Nail by Lauren Bavin of DSP
Chipboard Aloha by Linda Sattgast of Scrappers Guide
Stitching by Michelle Coleman and Sausan's Designs
Fonts used are LD Punch In and DJB Canay
Photo overlay by Katie Pertiet

Wednesday, February 13, 2008

Happy Valentine's Day


I was inspired by Ali Edwards Butterfly Project to make something up for Valentines day.
Papers from Impressions of Romance by Studiogirls


Tuesday, February 05, 2008

Can it really be February?

I can't believe that I last posted in November! So much to do...so little time! The holidays were jammed packed so for December I have an excuse. But what the heck happened to January? Did we have January or did I fall asleep on December 31st and wake up to February 5th? Sometimes I feel like I am constantly busy and getting nothing done!

I have been working on my 2007 scrap last month layouts. I enjoy doing these as they remind me of all that I have accomplished when I feel like I get nothing done. I am almost finished with December. Then I will print them, put them in my 8x8 Pioneer album, look at them and see all the wonderful things we did last year!

Have you heard of Project 365? A lot of people are talking about it. It seems to have started at Photojojo. I jumped in on the 20th. I suppose for this year it should be called Project 366, but the name stuck with me so I am calling it Project 365. Instead of posting my pics here on my blog I decided to use my free flickr account. It seems a nice way to keep them all in one set and see the progress through the year. If you would like to see my photos you can go to My Project 365.

I created this layout using one of my Project 365 photos. Check out the font used below the picture. That is a font created from my hand writing. How cool is that. Darcy Baldwin created the font and she did a great job, I am really please with her work.

I used Lori Barnhurst's Laughter kit. (Flower slightly recolored to match the vase)